Positive change

Rather than New Year's resolutions, which are always all the rage at this time of year, I prefer to think about positive changes I can make for the coming year. This time last year I wrote about how God was helping me to see clearly and that my focus for the year was to "listen and obey". This has helped me immensely during the year to be calmer and more grateful.

I started wondering a couple of weeks ago whether God was going to give me another nudge to step things up or move in new directions. I waited, nothing. I prayed, still nothing. Then He hit me with it.
"Give more". Good, I can do that, I love to give and I can always give more!
Then He helped me to hatch a plan.

Some time ago my Mum in Law told me about an organisation called Mary's Meals. In a simple form, they distribute meals to disadvantaged and impoverished children at school. This works so well because the children come for the food and stay for the education, no child can learn effectively on a painfully empty stomach. It is a simple plan, but life changing.


If you follow the link there is a video to watch and lots more information about the organisation.

I'm hoping I can use my skills and talents to make regular donations.

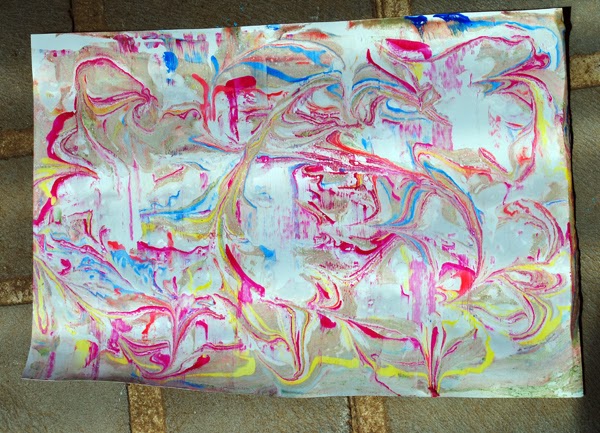
My (loose) plan at the moment is to hold a monthly auction for some of my handmade goods. I'll try to make something special and probably hold the auctions on my Facebook page where people can bid in real time. I'm not always great at following through with ideas, but with God's help I hope it will be a huge success.

I'll let you all know when the first auction will be held :)

Now, onto another matter. I want to thank you all for your support this year. I have been so overjoyed with the interest shown towards my work and this Christmas period has been my busiest in the 5 years I've been a handmade artisan. It brings me so much joy to know the things I make are loved and valued.

Thank you! I wish you all so much grace for a truly blessed year!

Merry Christmas!


I wish you all a most blessed, happy and holy Christmas! I thank you all for your ongoing support this year and look forward to returning soon.
God bless you and your families!

No stress this Christmas.

As we have been going about our regular errands and appointments I've noticed a change in my relatively busy outer city suburb. This change happens about this time every year. It starts with rushing, pained expressions, the inability to obtain a car park and by this time next week will have worked itself into a frenzy. Yes, it's Christmas.

The junk mail piles up almost daily in my letterbox, the traffic is terrible and people are stressed. People are pre-occupied with who is coming, how many to feed, what gifts to buy on credit to increase their debt just that little bit more.

That is how "the world" celebrates Christmas. But we do not need to be part of that, and that is not part of us. We celebrate Christmas because we love Jesus, and this is his birthday. It is also a time for relaxing, enjoying family and a few treats. What is so stressful about that?!

This year my husband is working right through the Christmas period so we have decided to keep things as simple as possible. Latin Mass on Christmas Eve, a few presents for the children on Christmas morning before husband leaves for work, plenty of fresh fruit, a few special food treats, our traditional fruit punch and a pudding of some sort. When husband returns home we can have our usual Christmas concert (sharing of poems, songs, plays and talents) and just enjoy being together.

If you are feeling stressed or anxious about Christmas I ask you to dig deep and ask yourself why. Because the most important thing about this Christmas is that your words and actions bring glory to He who is the reason for the day itself - Our Lord and Saviour Jesus Christ.


"Adoration of the Shepherds" by Gerard van Honthorst, 1622

Healthy chocolate

There are a lot of recipes for healthy chocolate now and the ingredients vary, usually according to the "type of eating" you're subscribed to. I'm just trying to be healthier, so here is my version of healthy chocolate.


3 tablespoons virgin organic, cold pressed coconut oil 
2 tablespoons cocoa powder
2 teaspoons of honey
2 teaspoons of desiccated coconut (optional)

Melt the coconut oil with the honey and stir to combine thoroughly. Stir in the cocoa powder, then the desiccated coconut. When combined, pour out into chocolate moulds. If you don't have moulds you can pour into a container with sides, then cut into chunks when it's set.
Place in the freezer, unmould when totally set. Store either in the fridge or freezer - I store in the freezer so I can grab one in the evening when my tastebuds are crying out for something sweet :)
Enjoy!


Girl's dress recon


We have some kind neighbours who often give children's clothes they no longer need (they have 3 girls so it works out well!) I loved the fabric and full skirt of this Pumpkin Patch dress but the halter neck was a little too lacking in modesty for my taste.


A pair of sharp scissors, a sewing machine and 30 minutes later... it's a skirt! I have had such precious little time to sew lately and this was such an easy alteration to make, it's even lined. The cost of the elastic and thread come to about $1, what a bargain :)


And most importantly, it passes the twirl factor!


Screen printed art

I'm excited to share the news that art prints are now available in my husband's Etsy shop. 
So you can fully appreciate these prints, let me tell you how they are produced :)


Firstly, he draws the design by hand. No computers, just pencil, pen and paper (his protractor comes in handy too!) Next, the design is screen printed onto paper and dried. Lastly, he colours the design by hand with his beautiful set of Prisma pencils. 

Now, that's what I call authentic art! 

I hope you like them too. There are only a couple in his shop at the moment, but he will add more as he gets the time :)

Handmade in Australia Marketplace

I've started a new Facebook group - Handmade in Australia Marketplace in order to further my support for Australian Artisans.

Having been a member of many Facebook groups I've found that they can be "stuffy" when it comes to artisans sharing items that they happen to be selling. Some groups consider this to be spam. What a pity.


Here is my artisan selling philosophy: Lets all help each other. Pretty simple, right? One of the hardest aspects of having a handmade business is getting the exposure you need, and if we all helped each other freely, then we all benefit.

So.... if you're a handmade artisan or artist and you are Australian, you are welcome to join the group. You can post photos of your products, links to your shop or website, recommend other artisans you like, invite your friends to join,  or if you are a supporter of handmade you can browse and follow the links to shop :)

Silk, beautiful silk!

I love silk, don't you? Not just for the way it feels when you wear it or the way it takes dye so beautifully, but also for the way it's made - so cool!


So, I thought I'd share with you some of the work I've been doing with silk of late. I've been implementing a lot of Japanese dyeing techniques with excellent results.


Arashi - meaning "storm" creates these wondrous waves.


I cheated - this is bamboo, not silk, but I love the results so much I couldn't not share it!


Crepe de chine, different to silk habotai but equally wonderful in it's qualities.


Some of these scarves have already sold but others have only just been uploaded to my Etsy shop, so pop over for a gander if you see something you like - they make wonderful gifts too :)


Giveaway at Twisted Ink!

To celebrate the opening of his Etsy shop, my lovely husband is having a giveaway on his Facebook page. Take a look, you could win a shirt and even get to choose the design you like best!


Good luck!

Watercolour workshop

I've been stumbling along by myself with watercolour for some time, waiting for the right time to do a class. Last week, I was very blessed to attend a one day workshop with local Melbourne artist Stefan Gevers.


Although my results weren't brilliant, I did learn a great deal and solidified a lot of the knowledge I'd gained from books. I feel like a few gaps have been filled in and I'm better equipped to move forward with my painting.


And mostly, I really enjoyed the intimate class in Stefan's home studio. I would really love to take some of his regular classes, particularly the botanical ones, he is very talented and a great teacher too.

You can view Stefan's work here and find out more about his classes and workshops here.

Twisted Ink on Etsy!

Dreams, we all have them right? My wonderful husband has worked diligently in his day job to support us at home. Without him we would not be able to live our lifestyle. But he has dreams. His dream is to make a living as an artist. And now, the dream has started to come to fruition.


He has been creating his drawn designs by hand for some time now. Recently, some of those designs were screen printed onto t-shirts.


The t-shirts are either organic or fair trade. The inks are water based.


They look so great, he can't wait to get out there and start selling them. He plans to have several market stalls (the difficult part is fitting this in around his regular work).


He has opened an Etsy shop, and slowly but surely we are uploading his shirts. I'm so proud of my husband to have been able to take the initiative to use his talents in this way. I would love for you to take a look at his new Etsy shop!
He can also be found on his very popular Facebook page.

Gossamer Dreams tonight!


A reminder that the final stocking for the year is happening tonight at Gossamer Dreams . Here are some revised opening times depending on where you live:
8pm for Brisbane / Qld shoppers
9pm for those with Sydney, Melbourne, Hobart as their Capital city this is you.
8:30 for Adelaide and through the centre of the country
6pm for Perth and those in the west.

I have 4 items up for grabs, so head on over early so you don't miss out! Happy shopping!

A typical homeschool morning...

People who are interested in homeschooling often wonder what to expect and wonder "what is a typical homeschool day?" Yesterday as we were going about our morning activities it struck me that is was a very typical morning for us.


The younger girls are playing card and board games. This can go on for a long time. If the weather is fine, they are usually in the garden playing with their animals and other games. Later, if it suits everyone, they will spend some time at the table doing some book work (phonics, maths, religious education etc).


The older two are at the table, working fairly independently on work I have planned for the previous night. Sometimes they need my active participation, other times they just work at it themselves with me as "consultant".


And you will often find me in the kitchen preparing for later. I'll be making bread, planning for lunch or dinner, baking, cleaning. It's a good place for me to be because of the open plan of our home I am readily accessible to all the children.

We only ever do book work until lunch time and often enough we don't do any at all. Sometimes we would rather go out, sometimes games are just too much fun to be interrupted and sometimes the weather is just too nice to sit at a table and study. 

Our afternoons are spent however we want to spend them. There is always plenty of art making and crafts. Gardening, reading, games, story writing, bike riding, baking - there are so many ways to spend an afternoon!

I know homeschoolers who put in a regular school day with regular school books and regular school rules. They have tests and formality.  It's not for me. It's not for us. We have such a unique and wonderful opportunity to pursue interests and passions and really live life and I wouldn't have it any other way!

Gossamer Dreams this week!


I'm honoured to once again be a guest at Gossamer Dreams this month.


Here are some sneak peeks of my contributions :)


This will be the last stocking of the year, so a great time to find some unique handmade Christmas gifts.


Items will be available for previewing on the 14th at 8pm, with the listings going live on the 15th at 8pm. I hope to see you there!


Shaving cream marbling on paper

This has to be one of the easiest (and messiest!) ways for children to produce a unique art piece.
All you need is paper (160gsm is good), poster paints and shaving cream (the cheapest brand works fine).
Make a layer of shaving cream on a tray. Make dots or lines of paint. Swirl with a chopstick or similar. The more you swirl, the more intricate patterns you will get, however if you overdo it you might muddy your colours.


When you have a pattern you like, carefully place your paper on top and lightly press all over (lightly!) Peel the paper off and use a paint scraper of similar to scrape the excess shaving cream and paint off to re-use. Put you paper somewhere to dry.


Keep re-using the shaving cream, reapplying the paint if desired, until it's too coloured to use. Then have some messy fun with the leftovers! (Good for making hand or foot prints on paper too).


This is messy. The easiest wash up for hands is to stick them in a bucket of water outside (the hands, not the children). The trays and tools wash up in warm water.


Here are some of our masterpieces.


They can be framed and hung.


Or used as wrapping paper or even for the basis of another project (collage, background for a picture etc).

Colour me happy!


Colour plays a huge part in the way my work is produced and is a major inspiration. Here are a few 
of my favourite colours recently. 


1. Rainbow from our garden.
2. Arashi shibori hand dyed bamboo scarf
3. Brolgas on farmland in Western Victoria
4. Springtime hand dyed yarn
5. Arashi shibori hand dyed scarf in magenta

Making great compost

This time last year I was a complete flop at making compost. We have always had plenty of material to make compost with, but for some reason it just wasn't happening. I read about compost from a variety of sources and it seemed complicated. Then I got a Don Burke book from the library and after reading the section on compost something clicked. Since then, I've been making great compost and I'm happy to share what I know with you.


Here is some of my compost from the ready to use heap.


And this is what the working compost heap looks like - lets call it a work in progress!


The ready to use heap. My husband and a friend made this with star pickets, old lattice, bamboo and black plastic. It's about 1.5 metres high and has an opening door at the front for easy access.
I find that compost performs better if it's contained rather than just a heap, but it's fine to start out with a heap if you need to.


This is my working pile - an old heavy duty plastic drum with holes drilled in the sides near to the bottom. I swap between the 2 heaps. So, when this blue one (my current "working" compost) is full enough I will leave it to sit and stop adding to it. By that time, the black heap will be all used up on the garden and ready to start working and being added to again.

So, here are my key elements to good compost:

* Balance ingredients. If you only put in kitchen scraps your heap won't be happy. Lets looks at what I have in my working pile at the moment. Kitchen scraps (veg peelings, tea leaves, coffee grounds, paper towel, shredded newspaper, grass clippings, leaves in Autumn (brilliant!) straw, garden soil and any organic matter. No meat or bread scraps unless you want some visitors of the rodent variety!)

*Moisture. This is important. I've discovered that my compost used to be too dry/too wet - I didn't have the balance right. It should be moist and if you get the right balance of ingredients it's easy to control the moisture content. If it's too wet, add a little dirt, straw or shredded newspaper. If it's too dry, water it or add more wet ingredients (leftover tea from the pot, more veg scraps).

*Cut up ingredients. All the veg scraps or garden cuttings should be chopped up to maximise the breaking down process. I used to put in huge chunks of old vegetables or big sticks thinking they would break down - it doesn't work. I only use the more fleshy garden cuttings, all woody cuttings go into our green council bin, which is taken away and mulched. If you have your own mulched you can do this yourself.

*Turn regularly. Also really important! I use a pitchfork and turn both composts every 2 days or so. You don't have to do it this often but at least once a week this should be done.

What have I left out? Any questions, ask away!


This blog is closing!

All posts will now be found at my new site.  Click here to go the the new site.